Updated · View the original (2022)
How to Capture Real Estate Photos That Sell: A Field Guide
A buyer decides whether to open your listing in about a second, and that decision is made on one photograph. Almost every home search now begins online, well before a buyer talks to an agent or drives a neighborhood, which means your lead image is doing the work a curb-appeal moment used to do. The National Association of REALTORS confirms the search starts on a screen for the overwhelming majority of buyers in its 2025 Profile of Home Buyers and Sellers. If the first frame does not stop the scroll, nothing else about the property gets a chance to.
The payoff for getting this right is measurable. Redfin found that homes between $200,000 and $1 million photographed with a professional camera sold for $3,400 to $11,200 more relative to their list price than comparable homes shot with amateur photos. On a Texas listing, that gap is larger than the cost of the entire shoot. This guide walks through how those photographs are actually made, from the prep before the camera comes out to the settings, lighting, and honest editing that separate a snapshot from a frame that sells. It is written for the agents and sellers deciding how a home gets presented, including those who intend to attempt some of it themselves.
Start before the camera: prep and a walk-through
The best real estate photographers do their most important work before they take a single keeper. Walk the house and the yard the way a buyer will, room by room, and fix what the camera will punish. Clear countertops to near-empty. Straighten blinds so every slat sits at the same angle. Hide cords, remove pet bowls and trash cans, close toilet lids, and pull down anything on the refrigerator. The lens sees clutter the eye politely ignores.
Then shoot a few deliberate test frames of each space before you commit. Two or three per room, one or two of the backyard, a couple of the front elevation. Look at them on a real screen, not the camera's tiny display. Problems that are invisible in person jump out in a photo: a crooked lampshade, a reflection of you in a mirror, a room that looks flat from the doorway but comes alive from the corner. This test pass is also where you decide what each room's hero angle is, so the real shoot is efficient and consistent. A little staging earns its place here too, since a set dining table or a bowl of fresh lemons gives a room a sense of life without feeling occupied.
Gear that earns its place
You do not need the most expensive camera on the shelf, but interiors are unforgiving and the right tools matter. A modern full-frame mirrorless body gathers light cleanly and holds detail in shadows and highlights, which is exactly where interior photos live or die. Pair it with a wide-angle lens, roughly 16 to 24mm on full frame, so a normal Texas living room does not read as a closet. Wide is essential, but there is a ceiling on it, which we will come back to.
Two accessories do more for image quality than any megapixel count. The first is a sturdy tripod, which lets the camera sit still through long or blended exposures and keeps your verticals honest. The second is an external flash, ideally one you can bounce off a ceiling or wall. On-camera pop-up flash flattens a room and throws ugly shadows; a bounced external flash fills a dim space with soft, even light and gives you the raw material for the blending technique below. For the exterior and lot, a drone extends your reach, but note that flying commercially in the United States requires an FAA Part 107 certificate, so that piece genuinely belongs with a licensed operator.
Get the room level and true
Nothing marks a photo as amateur faster than walls that lean. Because a wide lens exaggerates any tilt, a camera pointed slightly up or down makes vertical lines, door frames, cabinet edges, and window trim, splay inward or outward like a funhouse. The fix is discipline, not software. Mount the camera on a leveled tripod, keep the sensor plane vertical so the camera is neither looking up nor down, and use the in-camera level or grid to confirm it. When the verticals are truly plumb, a room instantly reads as calm, square, and professional.
Camera height is part of the same discipline. Shoot most rooms from roughly chest height, around five feet off the floor. Too high and the space looks compressed and you stare down into countertops; too low and ceilings crowd in and the room feels cramped. Around five feet keeps proportions natural and matches how a person actually experiences the space. Kitchens and bathrooms sometimes want a touch lower to show counters; that is a deliberate choice, not a wobbly tripod.
Compose the room, do not just point at it
Composition is the arrangement of everything in the frame, and it is what makes one photo of an ordinary room more inviting than another. The most useful habit is the rule of thirds: imagine the frame divided by two vertical and two horizontal lines, and place key elements, a fireplace, an island, the line where floor meets far wall, near those lines or their intersections rather than dead center. Nearly every camera can overlay this grid, and it quietly makes images feel balanced instead of static.
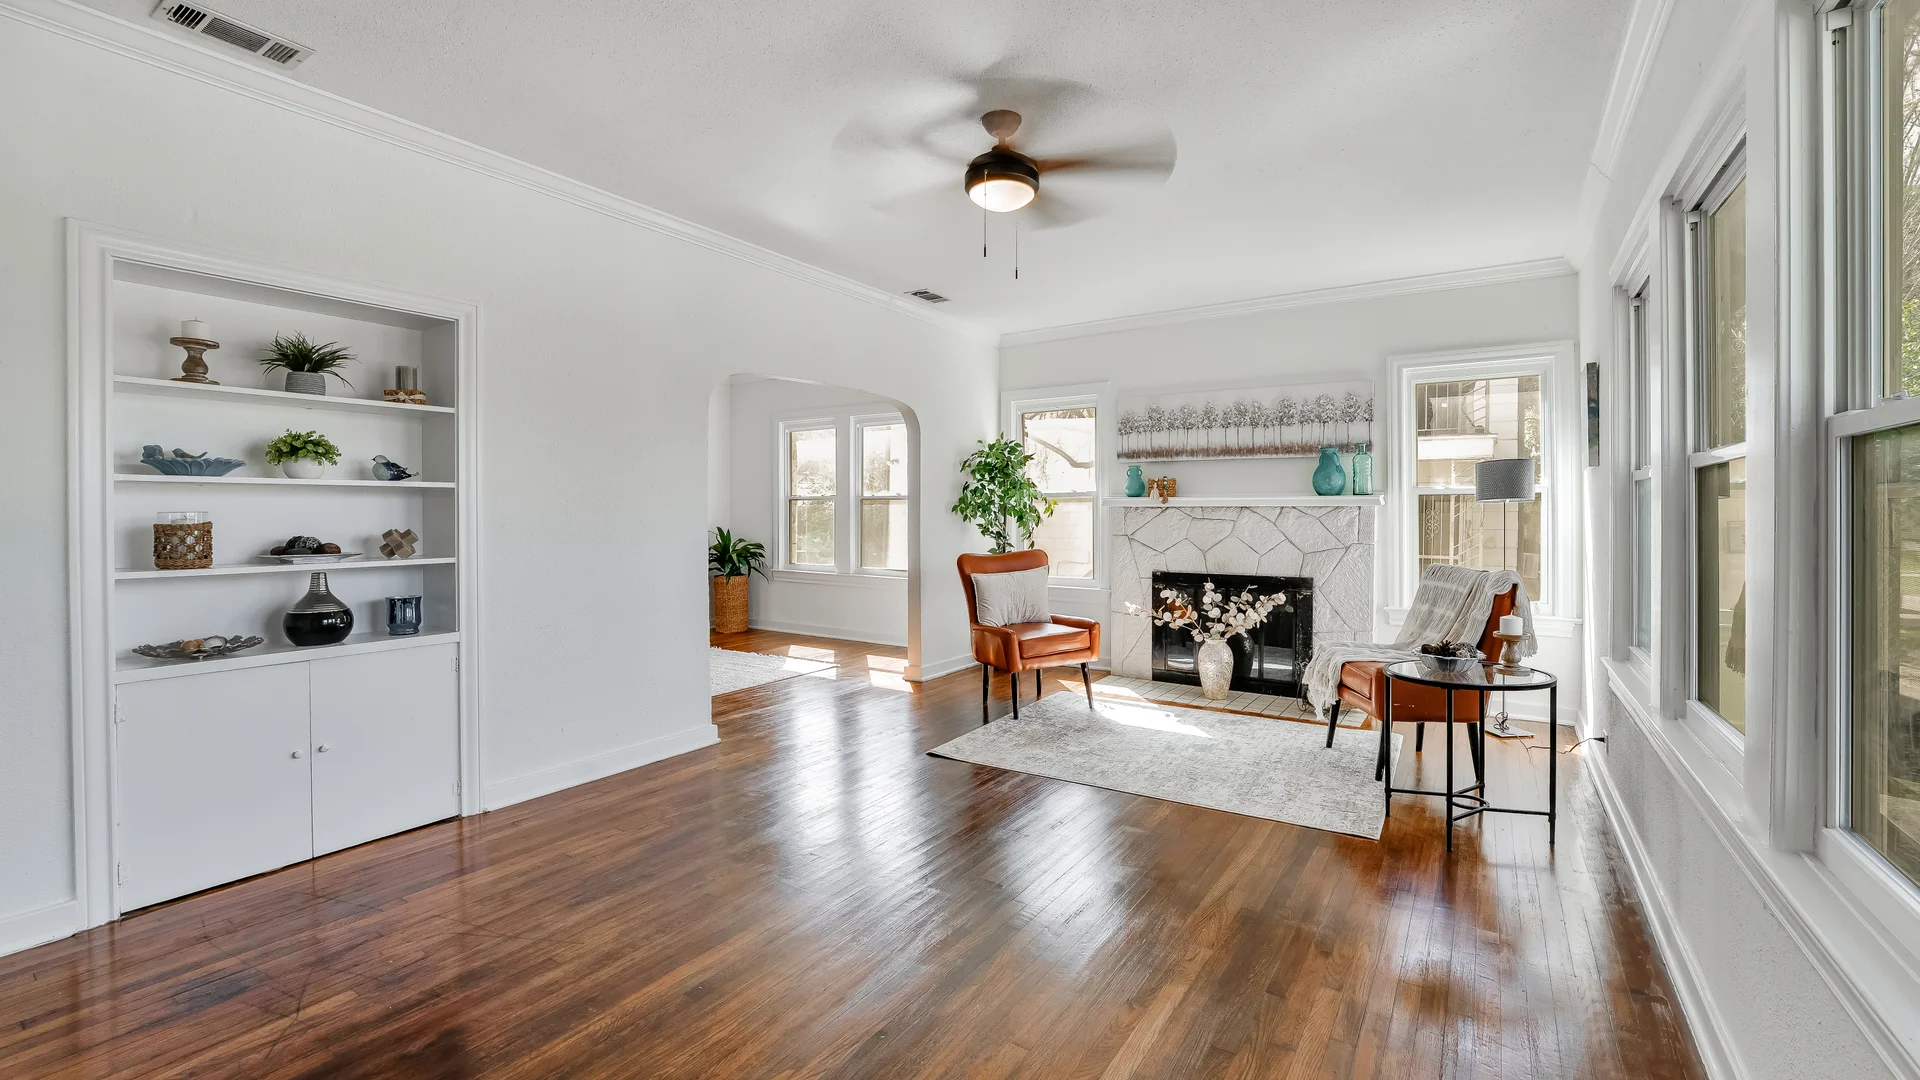
For rooms, the strongest frame is usually a two-wall shot taken from a corner, which shows depth and how the space flows rather than one flat wall. Lead the eye toward a focal point, a window, an architectural feature, the next room through a doorway, so the photo has somewhere to go. Try the room from more than one position before you settle, because what looks good standing in the space often does not translate, and vice versa. Save tight close-ups for details that genuinely earn one, like custom millwork or a stone hearth. A gallery of faucet and doorknob shots signals there was nothing better to show.
Solve the light: the window problem
Interior lighting is the single hardest part of real estate photography, and the reason is the window. Your eye sees a bright Texas sky and a comfortably lit room at the same time, but a camera cannot hold both in one exposure. Point a phone at a living room and you get one of two failures: a glowing white rectangle where the window should be, or a properly exposed window over a room gone dark and gloomy. First rule, then: do not shoot straight into a window. Work at an angle to it, or with a window behind you lighting the room, whenever the layout allows.
When the window has to be in the frame, professionals solve the range problem in one of two ways. The straightforward method is bracketing for HDR: the camera captures the same framing at several exposures, one for the bright window, one for the mid-tones, one for the shadows, and those frames are blended so the sky reads blue through the glass and the room stays bright. The higher-end method now standard on premium shoots is flambient, a blend of flash and ambient exposures. You shoot the room lit only by its natural and existing light, then shoot it again with a bounced external flash, then layer the two so the flash gives clean, true color and even light while the ambient frame preserves the natural mood and the window view. Flambient takes more skill and time, but it is why the best interior photos have crisp windows, neutral whites, and no muddy shadows all at once.
Blending also fixes the color problem that comes with mixed light. A single room often mixes warm bulbs, cool daylight, and a green-tinted fixture over the sink, and the camera records all three, leaving walls that look orange in one corner and blue in another. A dominant flash source overrides the mismatched ambient light so one clean color wins, and white-balance correction in editing finishes the job. Practically, open every curtain and blind, turn on every light in the house including exterior fixtures, and replace any dead or mismatched bulbs before you shoot.
Camera settings that hold up
With the camera on a tripod, you have the luxury of shooting for quality rather than fighting motion blur. Shoot in RAW, not JPEG, so you keep the full range of tone and color for editing. A practical interior starting point on most bodies:
Aperture: f/8, in the f/7.1 to f/9 range, so the whole room is in sharp focus front to back.
ISO: as low as you can, ideally 100 to 400, to keep images clean and free of noise. The tripod lets you stay low without blur.
Shutter speed: let it fall wherever a correct exposure lands, often somewhere between 1/60 and half a second indoors. On a tripod, a slow shutter is an asset, not a problem.
Focus: single-shot autofocus on a point roughly a third into the room.
White balance: a fixed value rather than full auto, so a series of frames stays consistent and is easy to correct together in RAW.
These are a foundation, not a formula. The exact numbers shift with the room, the light, and whether you are bracketing or adding flash, and reading the histogram matters more than any single setting. The point is to work deliberately, at low ISO on a tripod, and to capture enough range in RAW that the room can be finished honestly later.
Timing, natural light, and the exterior
Light has a schedule, and the best photographers respect it. Interiors generally shoot best in bright, even daylight when rooms are naturally filled with soft light. For the exterior, aim for a time when the sun is behind or beside the house rather than glaring into the lens, and avoid the flat gray of a fully overcast day when you can, since clear light gives you saturated color and a blue sky. A home that photographs beautifully at dusk is worth a dedicated twilight shoot, where warm interior light glows against a deep blue sky and produces the single most scroll-stopping frame in many galleries. Whatever the hour, keep exterior photos current: snow on the roof in a July listing, or bare trees on a home now surrounded by green, tells buyers the photos are stale and the listing has been sitting.
Edit to finish the photo, not to fake it
Editing is where a good capture becomes a great photograph, and where a careless one crosses a legal line. Legitimate work includes correcting white balance and color, balancing exposure, gently lifting shadows, straightening any remaining vertical tilt, and using your software's lens-correction profile to remove the barrel distortion a wide lens introduces. Cropping to a cleaner composition and removing a stray trash can are ordinary craft.
What is no longer acceptable is altering the property itself. Erasing a neighbor's roofline, deleting power lines, digitally enlarging a room, or using AI to add a fireplace, an island, or a view that is not there crosses from finishing into misrepresentation, and the rules have caught up. NAR now expects materially altered listing images to be disclosed, and California's Assembly Bill 723, in effect since January 1, 2026, requires agents to disclose digitally altered photos, keep the original unaltered image, and mark the altered version clearly, with real penalties for violations. Texas agents should read the direction of travel as settled: enhancement is fine, alteration must be disclosed, and inventing features that do not exist is never acceptable. That is exactly why honestly labeled virtual staging, which digitally furnishes empty rooms with a clear note that it has been done, stays on the right side of the line while a fake fireplace does not.
Know the shots stills cannot cover
Even a flawless set of stills is no longer a complete listing. Today's buyers, and in Texas that includes a steady stream of relocation and out-of-state buyers, expect to explore a home before they ever drive to it. NAR reports that 52% of agents now use drone imagery, roughly 70% of home shoppers use video to tour a home's interior, and Matterport reports that listings with a 3D tour sold up to 31% faster and for up to 9% more. A floor plan is one of the highest-return additions of all: Zillow found 81% of buyers are more likely to tour a home when the listing includes one.
A competitive listing now pairs strong stills with aerial photography that shows the lot and neighborhood, a 3D walkthrough for buyers who cannot visit in person, video that gives the home motion and story, and a floor plan that answers the one question photos cannot: how the rooms connect. Capturing all of it in a single visit keeps the look consistent and the listing whole.
The through-line: photography is a system, not a lucky shot
Every technique here points the same direction. Great listing photos are not one good frame you happened to catch; they are the sum of prep, a level tripod, deliberate composition, solved light, disciplined settings, and honest editing, repeated with judgment in every room. Any one of those done casually shows, and buyers read it as a signal about the home itself. Done together, they make an ordinary house look like the best version of what it truly is, which is the entire job.
If you would rather that standard be handled for you, see how we shoot Texas real estate and the consistency we hold across every market we cover.